
📘 What you will learn here
On this page you will learn how to set up your first sync, end to end: connect the other Jira Cloud site, create a simple sync rule, push one work item and check the result. It takes about 15 minutes.
Before you start, install Sync Bridge and prepare an account and API token on the other site. See Installation Guide.
Step 1: Add a connector
A connector holds the address and credentials of the other site.
-
In Jira, go to Settings > Apps > Sync Bridge, then select Connectors.
-
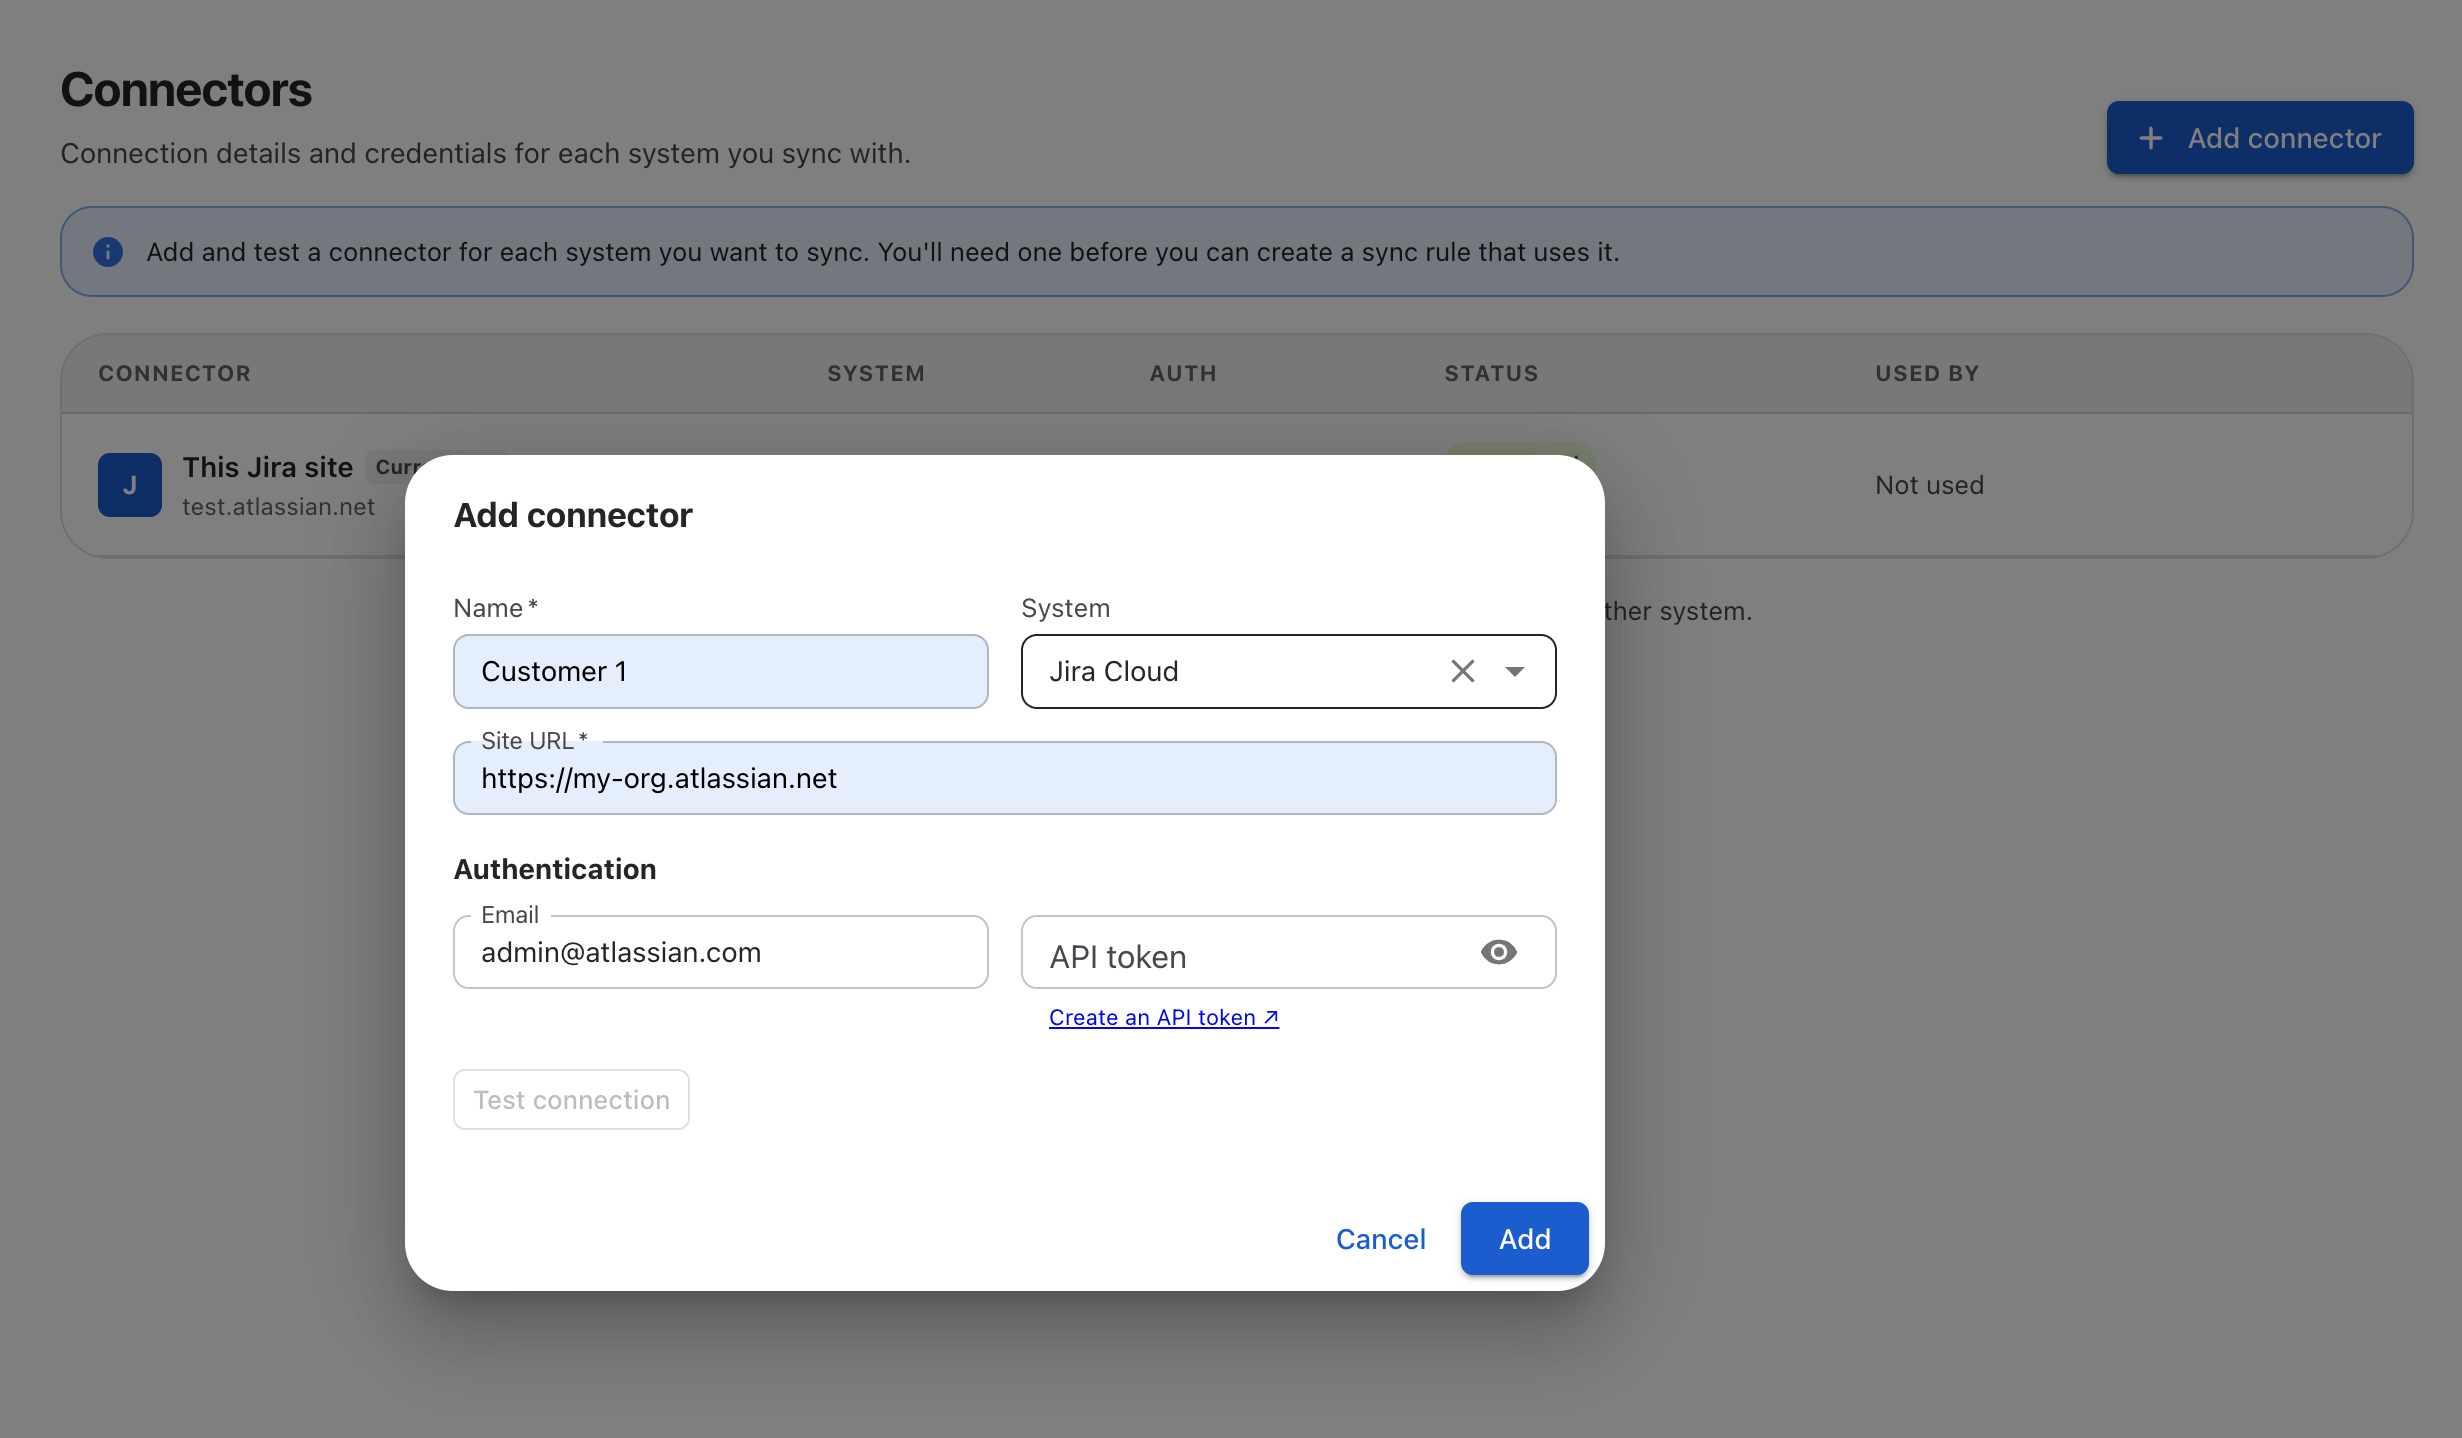
Select Add connector.
-
Fill in the form as described in the table below.
|
Field |
What to enter |
|---|---|
|
Name |
A name you'll recognize in sync rules, for example the customer or site name. |
|
System |
Jira Cloud |
|
Site URL |
The other site's address, for example |
|
|
The email of the account Sync Bridge uses on the other site. |
|
API token |
The API token of that account. |
Step 2: Test the connector
-
In the same form, select Test connection.
-
Check the result:
-
Connected to followed by the account name means the site and credentials work.
-
A message starting with Couldn't connect means the URL or credentials are wrong. Fix them and test again. See Troubleshooting.
-
If you see Connected, but this account isn't a Jira administrator, the connection works, but some features, like loading spaces and workflows, won't. Use an account with Jira admin permissions.
-
-
Select Add. The connector appears in the list with the status Connected.
Step 3: Create a sync rule
A sync rule decides which work items sync, where they go and what is copied. For a first test, create a rule that pushes work items from one space on This Jira site to one space on the other site.
-
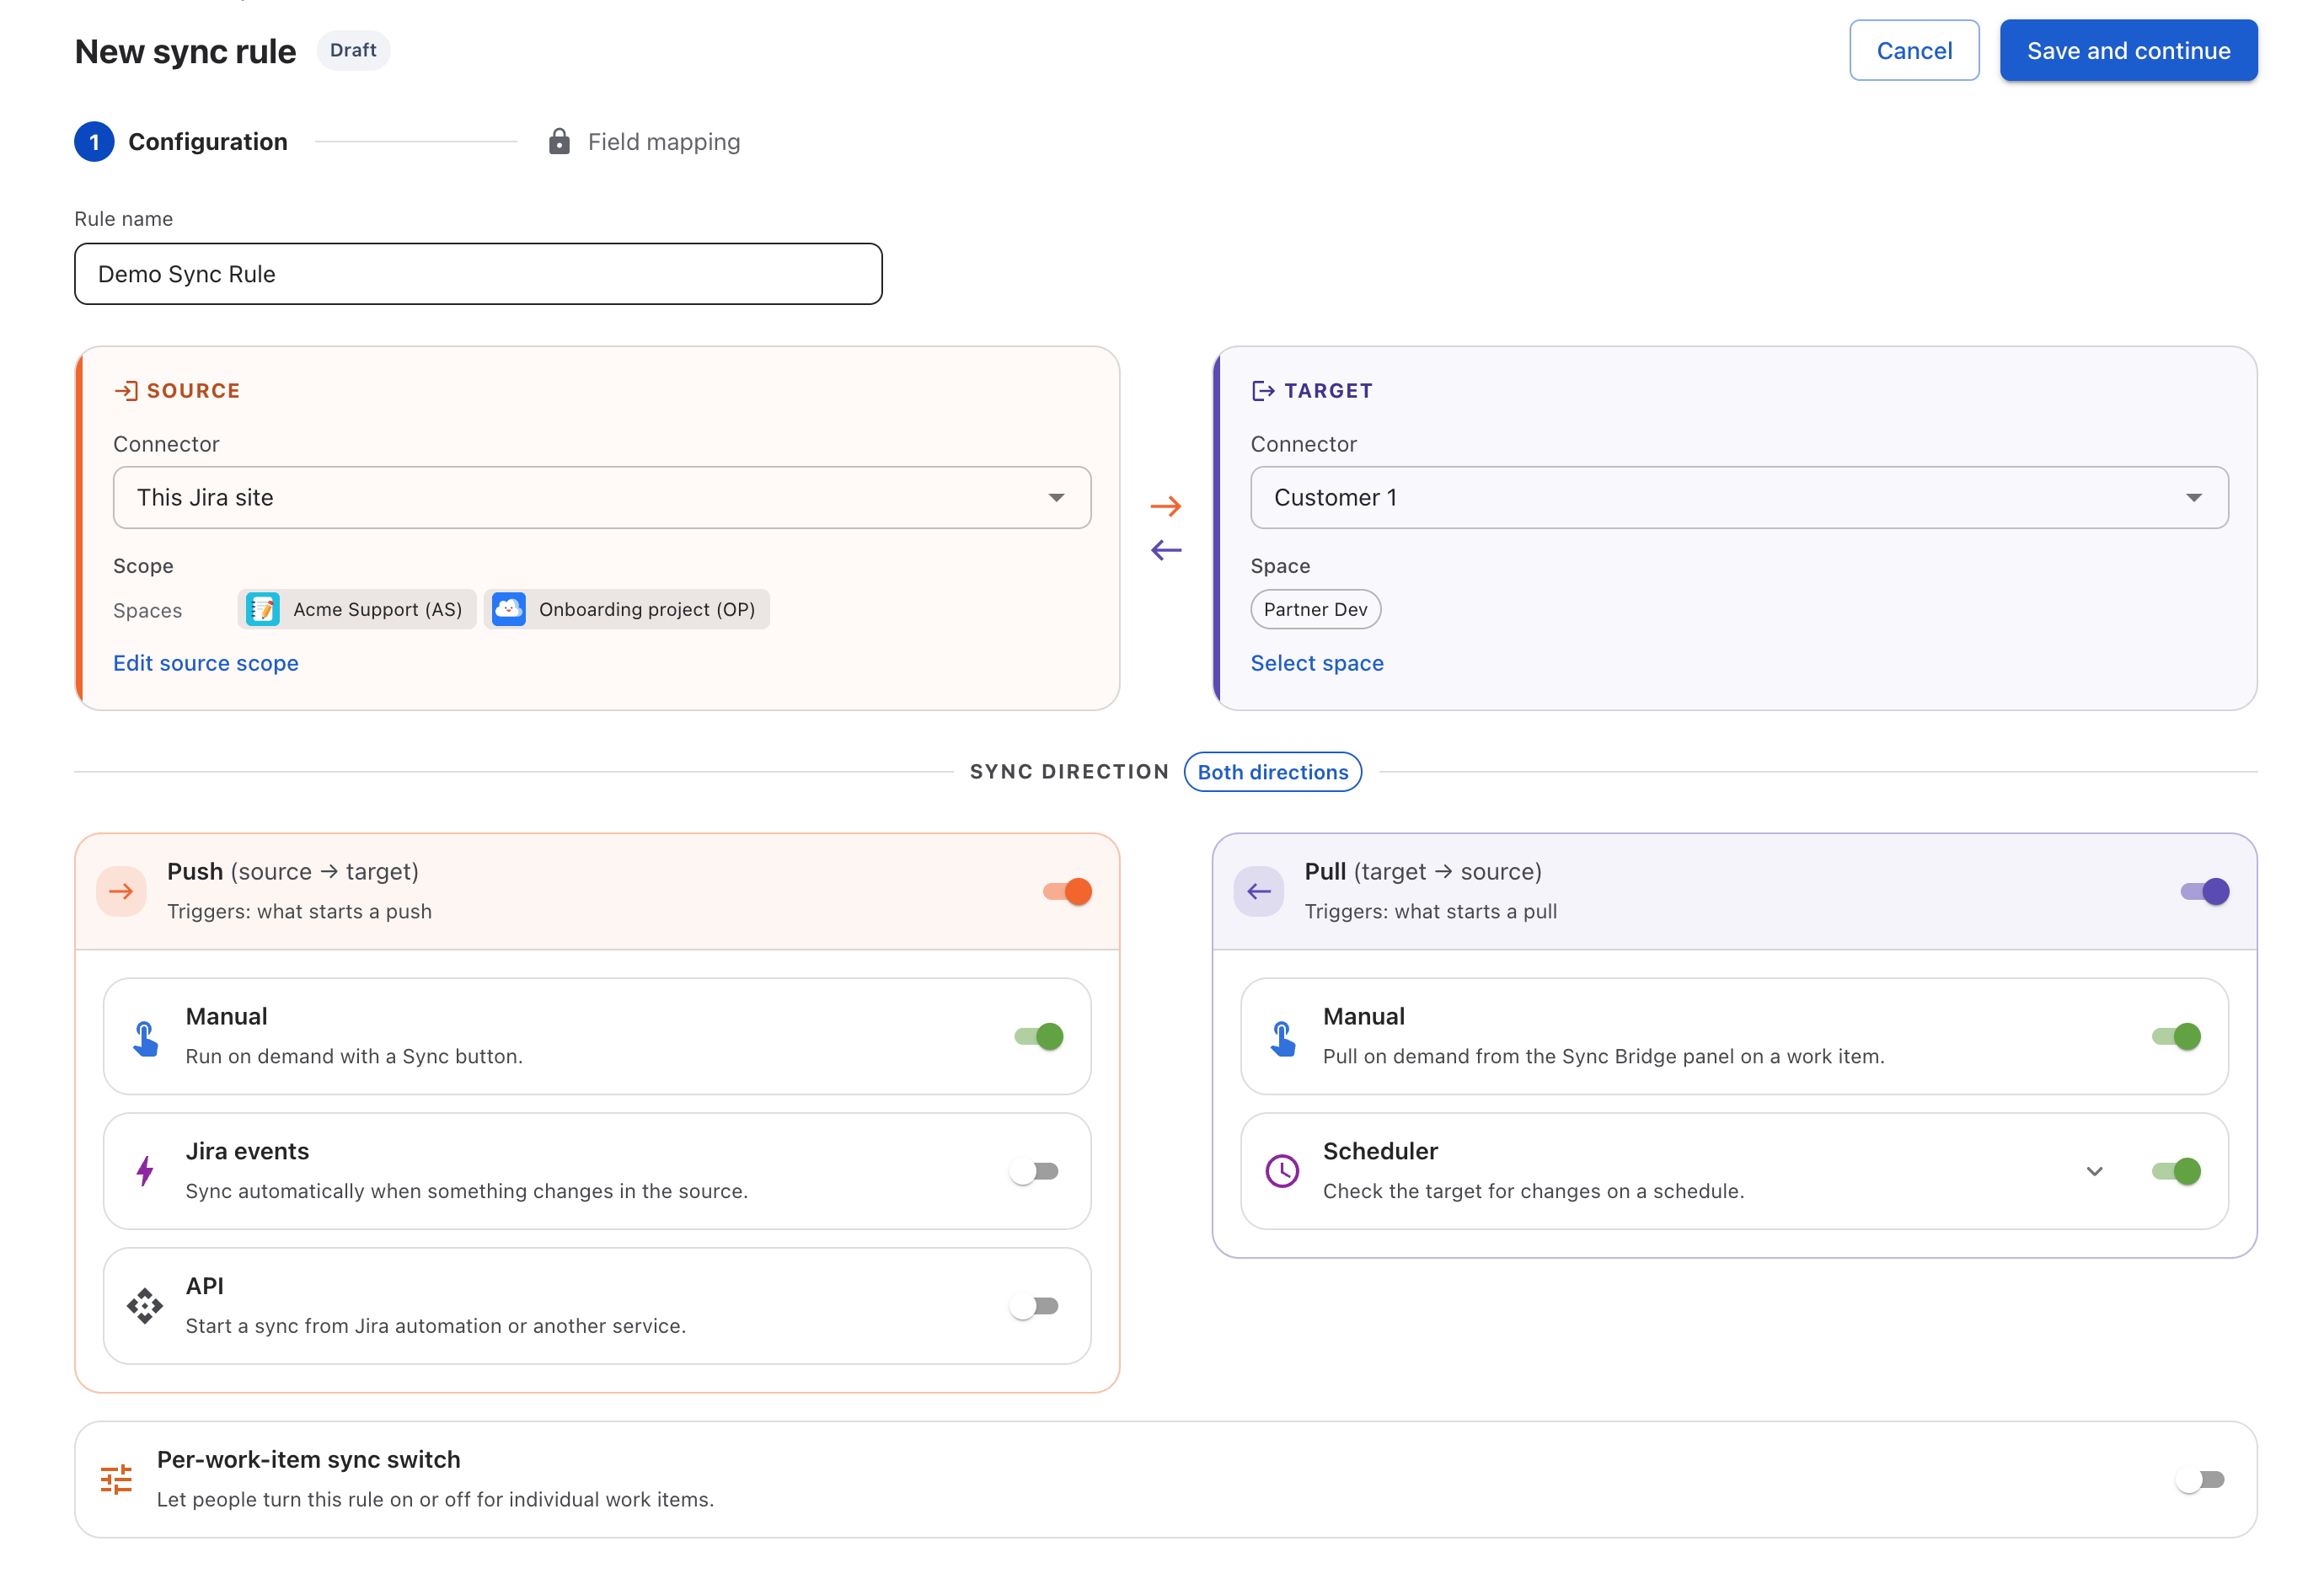
Select Sync rules, then Create sync rule.
-
In Rule name, enter a name.
-
Under Source, set Connector to This Jira site.
-
Select Edit source scope. Keep Basic, select one space in Spaces, and optionally narrow it with Work types. Select Done. If you leave everything empty, the rule applies to all work items.
-
Under Target, set Connector to the connector you added.
-
Select Select space, choose the target space in Space, and select Done.
-
Under Sync direction, leave Push on and Pull off. The direction shows as Push sync.
-
In the push Triggers, turn on Manual so you can push from the work item. You can also turn on Jira events and select events such as Work item created and Work item updated to sync automatically.
-
Select Save and continue. The Field mapping tab opens.
Step 4: Map the required fields
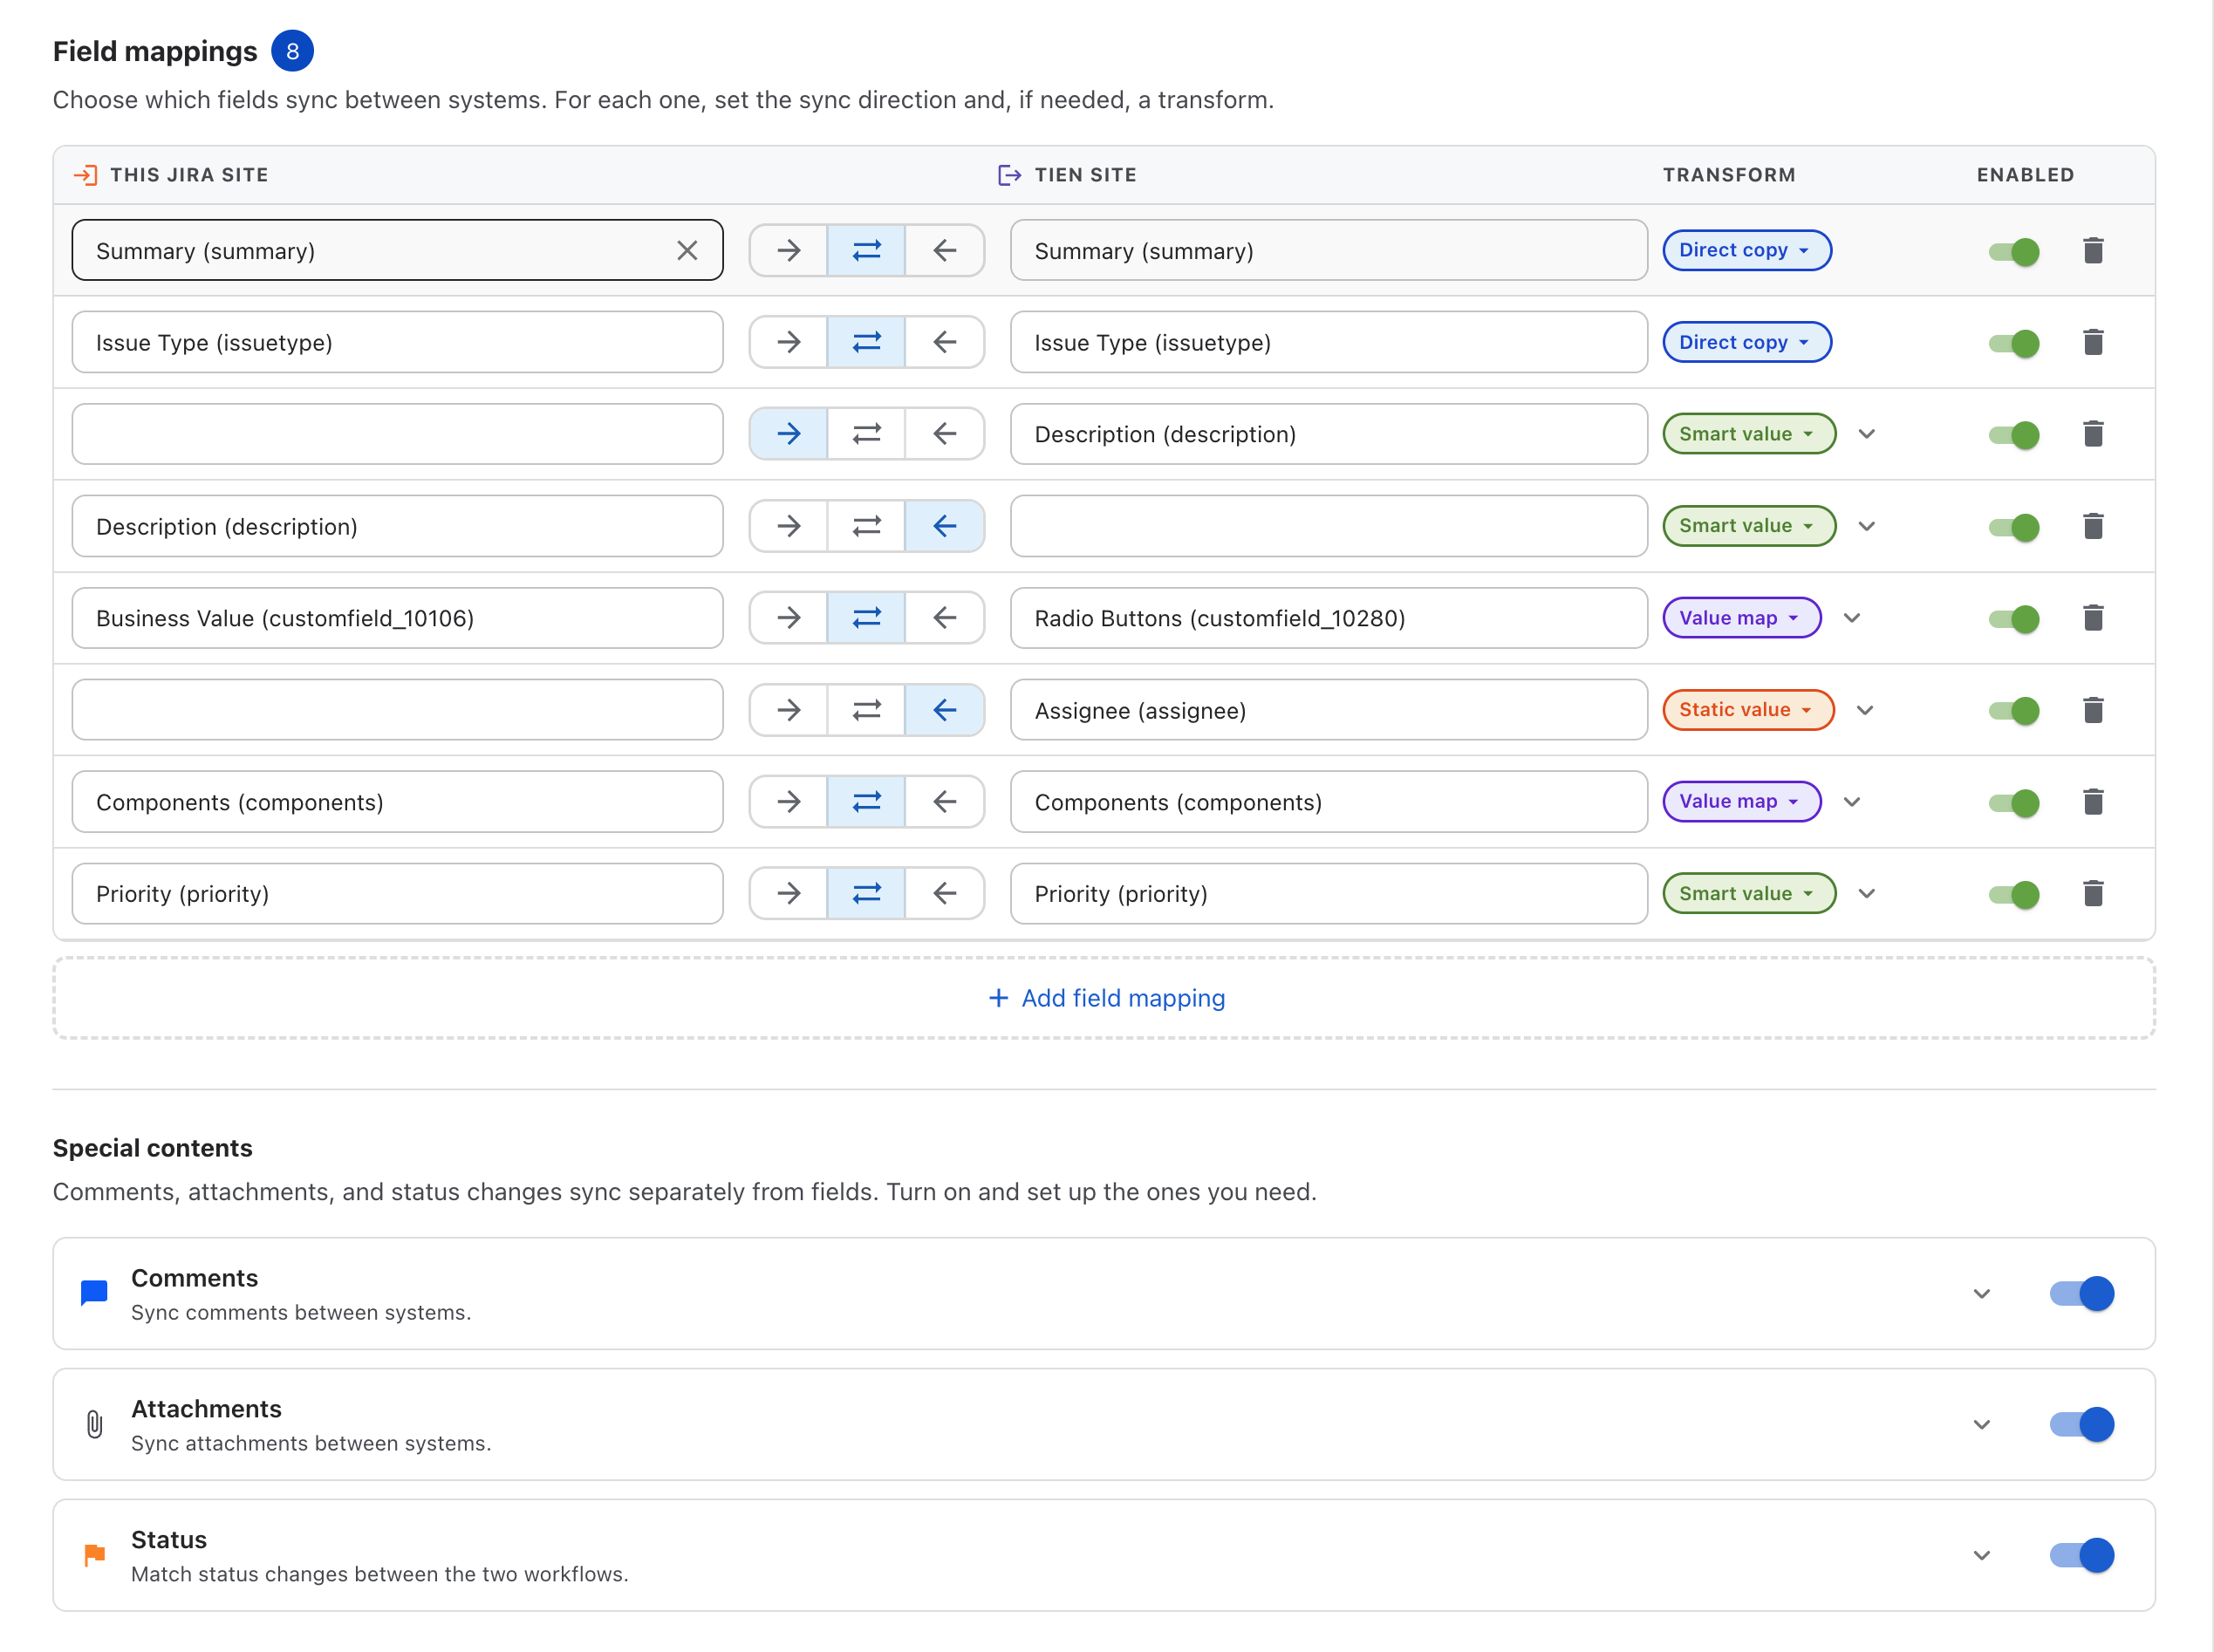
A new rule starts with two rows that Jira needs to create a work item: Summary and Work type.
-
In the Summary row, choose Summary as the source field. Keep the transform Direct copy.
-
In the Work type row, choose Work type as the source field. Direct copy uses the work type name, so it works when the target space has work types with the same names. If the names differ, change the transform to Value map and match each source work type to a target work type.
-
Optionally select Add field mapping to add more fields, such as Description or Priority.
-
Select Save changes. Make sure Enabled is on at the top of the rule.
Comments, attachments and status sync are set up separately under Special contents on the same tab. They're off by default. See Comments Sync, Attachments Sync and Status Mapping.
Step 5: Push a work item
-
Open a work item in the space you chose as the source scope.
-
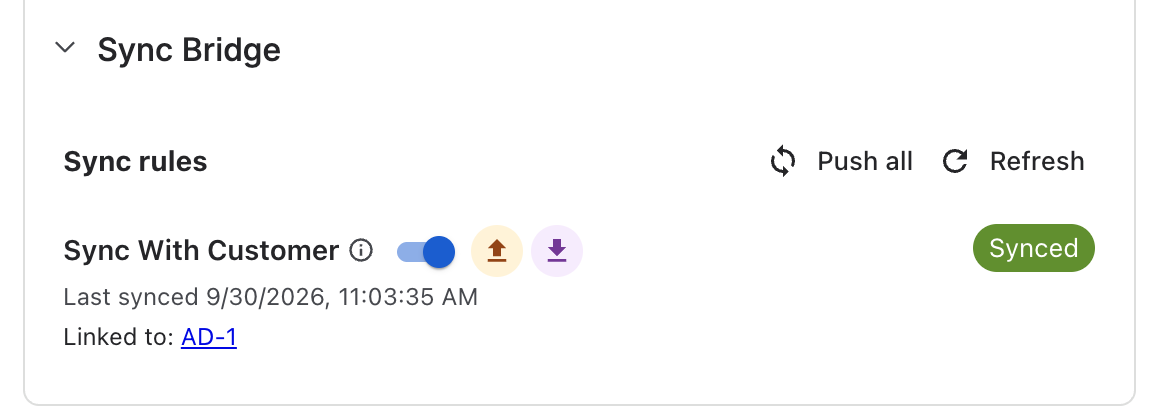
Open the Sync Bridge panel on the work item. Under Sync rules, you see a row for your rule.
-
Select the push button in the row (tooltip Push to the connected system). To push with every rule that allows it, select Push all instead.
Only Jira administrators can push, pull and retry from the panel. Other people who can browse the work item see the sync status only.
Step 6: Check the result
-
In the panel, the status changes to Syncing… and then Synced. The panel updates by itself; you can also select Refresh.
-
Under the rule name, Linked to: shows the key of the new work item on the other site. Select it to open it.
-
If the status is Sync failed, the reason is shown under the row. Fix the cause and select Retry. See Troubleshooting.
-
Open the Sync history tab in the work item's activity section to see what was synced, when, and who triggered it.
-
For an overview across all work items and rules, open Sync history on the Sync Bridge admin page.
Next steps
-
Create a Sync Rule: all sync rule settings, including pull and Both directions.
-
Field Mapping and Smart Values and Transformations: control exactly what is copied.
-
Settings Locked After Work Items Are Synced: what you can't change once a rule has synced work items.